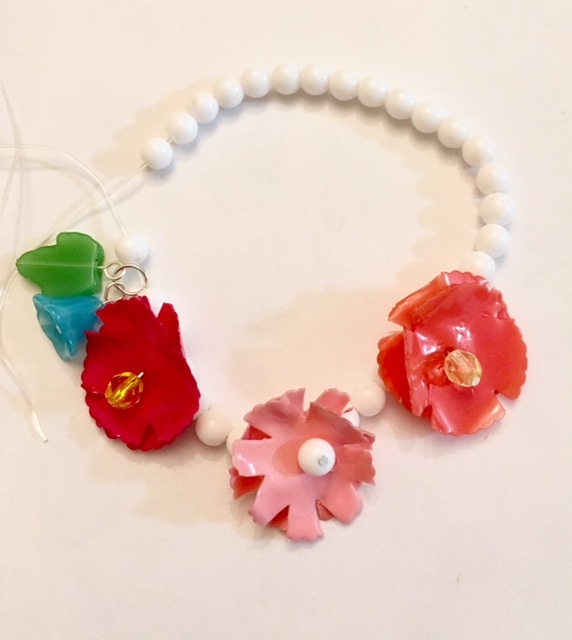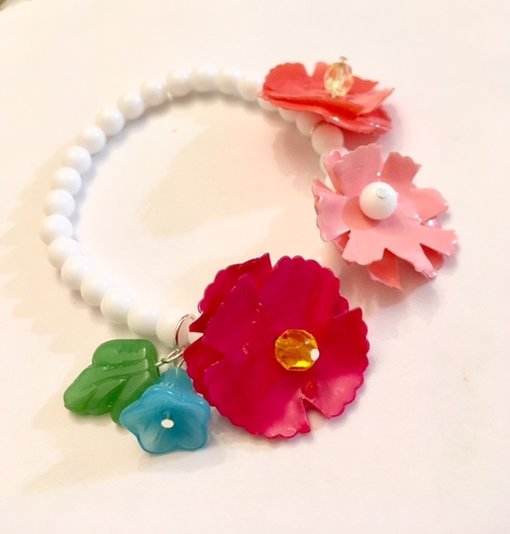
This colorful floral bracelet is made with recycled plastic packaging. I wanted a bright, fresh bracelet for spring and I think these flowers are super cute and vibrant. This tutorial is very easy and great for beginners. Once you see how easy it is to make these plastic flowers, you'll want to make tons of them!!! They make great gifts or craft show items.
I used a heat embossing gun to harden the plastic pieces and bend them into floral shapes and then I painted them with nail polish. If you don't have a heat embossing gun, you can try using a candle to apply heat to the plastic. Be very cautious when heating up plastic. You don't want to burn it, but getting it close enough to a heat source will temporarily soften the plastic so that you can mold it. It will also harden the plastic once it's no longer warm.
I used a heat embossing gun to harden the plastic pieces and bend them into floral shapes and then I painted them with nail polish. If you don't have a heat embossing gun, you can try using a candle to apply heat to the plastic. Be very cautious when heating up plastic. You don't want to burn it, but getting it close enough to a heat source will temporarily soften the plastic so that you can mold it. It will also harden the plastic once it's no longer warm.
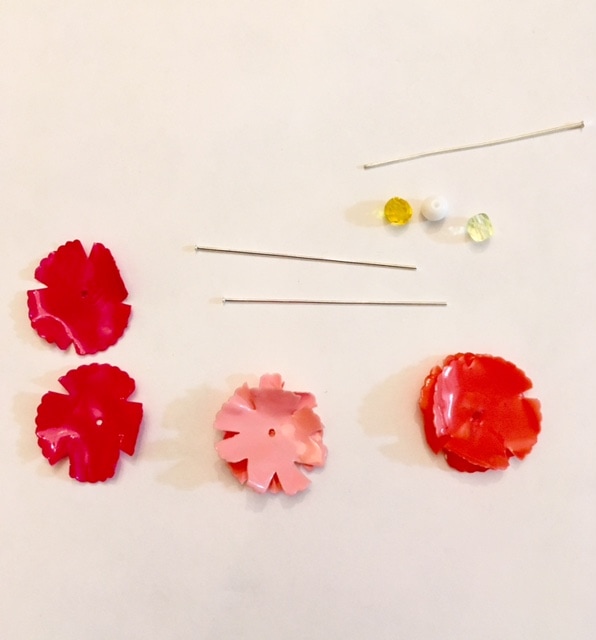
Materials Needed
- Plastic Packaging
- Nail Polish (Colors of your choice)
- Beads of your choice
- Stretchy String
- Head Pins
Tools Needed
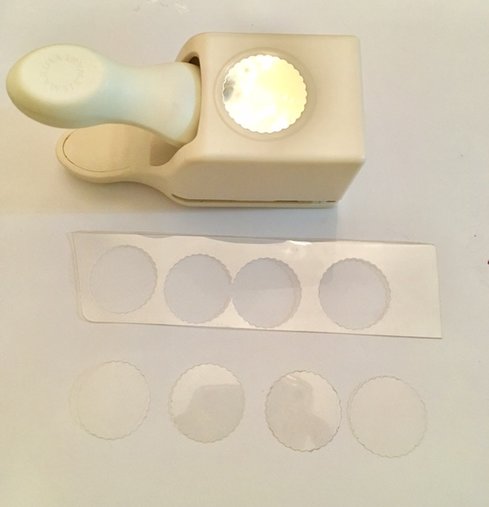
- Scalloped Circle Punch (Optional- you can cut out your circles with scissors)
- Jewelry-making pliers
- Heat-embossing gun (or candle)
- Pliers
- Scissors
- Small hole punch
Instructions
Step 1: Punch out 6 circles from recycled plastic packaging. Use the small hole punch to punch a hole in the center of each of the flowers. Don't worry about it being perfect, it the hole is slightly off-center it'll bring out the layering.

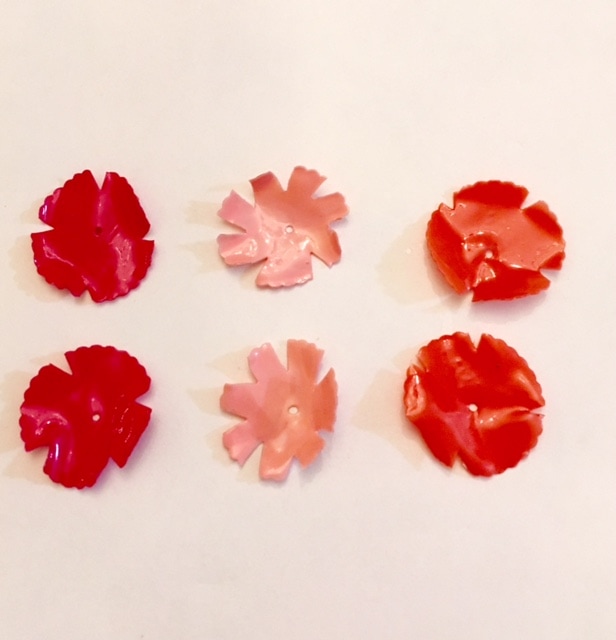
Step 2: Use the scissors to make cuts around the edges of the circles. Try making different cuts. This will create different "petal" effects.
Step 3: Use the heat embossing gun to heat up the circles and carefully bend them into the desired shapes. Hold the flowers with pliers so that you don't burn yourself.
Step 4: Paint the flowers with nail polish. Give it about 2 coats.
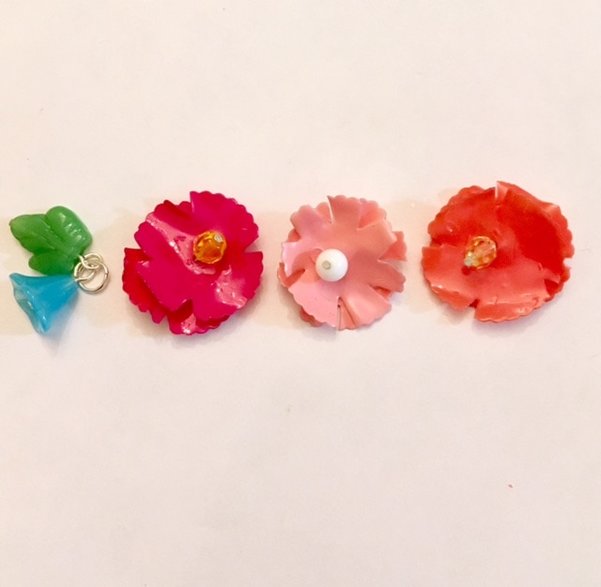
Step 5: Layer 2 matching flowers one on top the other. String a bead onto a bead pin and then slide the head pin through the holes of the flower center. Make a loop on the back of the flower. You can also use head pins to make additional dangles with other beads to compliment the flowers like the ones pictured below.
Step 6: String the flowers onto stretchy string and add beads to make a bracelet. Once you have the right length, make a surgeon's knot and trim excess ends.