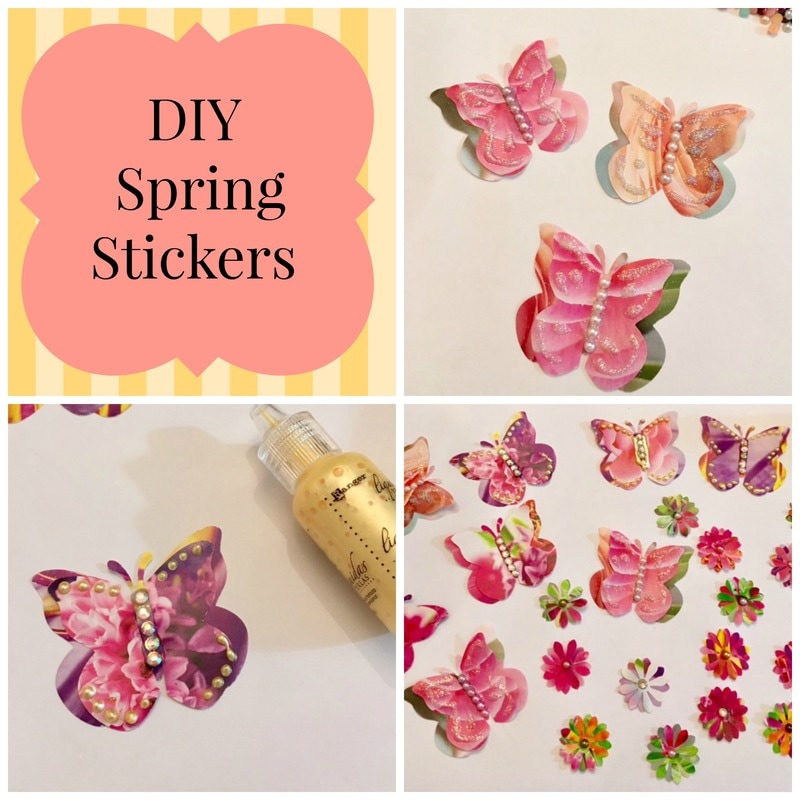
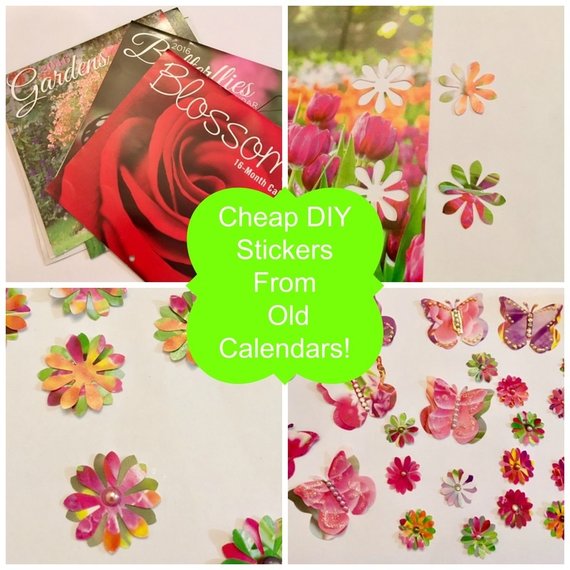
Lately I've been really obsessed with some old calendars I had lying around. The pictures were so pretty I knew I was going to make something with them. Most of the calendars had floral pictures so a couple weeks ago I started thinking of spring inspired projects that I would make with them. While I was at Michael's, I began to look at all these beautiful new stickers they had brought in, but I just couldn't justify paying for something I could go home and make. So when I got home, I got my old calendars, some punches and all my glitters and embellishments and came up with my own stickers. I love all the bright colors from the floral calendar pictures and they were so easy to make!!! If you don't have old calendars, you can make these from recycled magazines or newspapers. Explore with different types of papers and embellishments and make it uniquely yours. These stickers are great for greeting cards, letters, journals or even for swapping with friends!! Don't have a butterfly punch? You can create a butterfly shape from scrap cardboard and cut it out with scissors.
Materials
Old Calendars
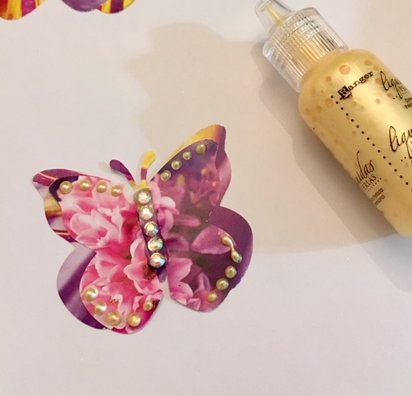
Clear glue (I used Glossy Accents)
Pearls, rhinestones, glitter and embellishments of choice
Double sided tape or Pop Dots (if you want your stickers to be dimensional)
Tools
Scissors
Butterfly Punch
Beeswax and Toothpick (This is optional, I used a toothpick with beeswax to place the pearls and rhinestones)
DIY Butterfly Sticker Instructions
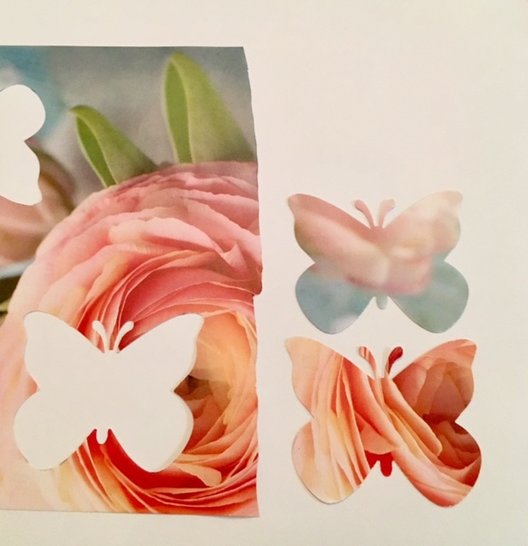
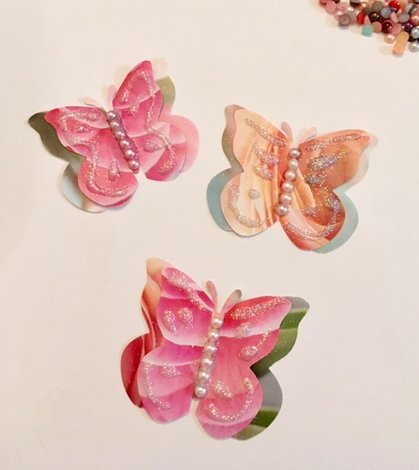
Step 1. Use your butterfly punch to punch out 2 butterflies from your old calendar pages. Look for sections of the page with vibrant color and try to combine contrasting colors for a fun, colorful look.
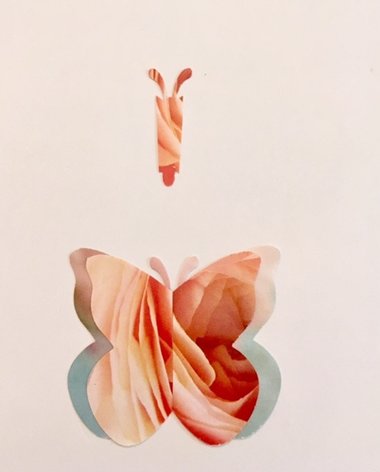
Step 2: Cut out the middle section of one of the butterflies. Glue the two wings to the center of the other butterfly cut out. Use very little glue and only on the center where the wings come together. You want the outer edges of the wings to be loose for dimension and movement.
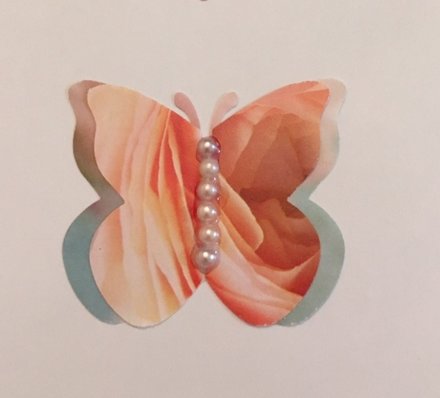
Step 3: Embellish the sticker. You can use rhinestones, pearls, glitter, dimensional paints, sequins, etc. This is the fun part so let your creativity take over and make it your own.
Step 4. Turn your butterfly into a sticker by either using double sided tape or pop dots. Pop dots will make it dimensional. You are now ready to use your butterfly stickers!!!! Have fun!!
Similar Projects and Variations
To make flower stickers to compliment your butterflies, see my tutorial, DIY Recycled Calendar Daisy Stickers. Now you are ready for Spring!!!! Enjoy and share with a friend!!!