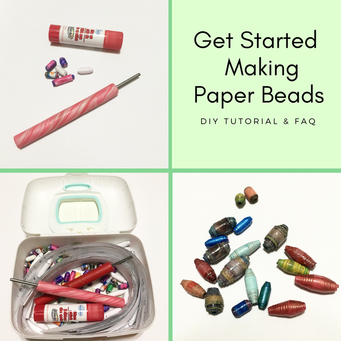
How To Make Paper Beads
Many years ago I made my first paper bead. I actually still have some of the beads from this first batch. I used an old magazine, school glue and a drinking straw to make it. It's most definitely not the best paper bead I've ever made, but it was a fun way to entertain myself during Summer break and I developed a love of paper beads that burns bright even now.
Since my first foray into paper beads I've experimented with many techniques and materials. I've made paper beads using toothpicks, skewers, straws, and paper bead rollers. I've cut the strips of paper in different shapes and lengths to achieve different end results and bead sizes. I've also experimented a lot with finishing techniques and glazing. After all the paper beads I've made, I've realized that there is always something new to learn and there are so many techniques!!! This post is a compilation of everything that I've learned about paper beads in the hopes that I can help you avoid certain mistakes I've made and so that you can have some really amazing paper beads!!
Since my first foray into paper beads I've experimented with many techniques and materials. I've made paper beads using toothpicks, skewers, straws, and paper bead rollers. I've cut the strips of paper in different shapes and lengths to achieve different end results and bead sizes. I've also experimented a lot with finishing techniques and glazing. After all the paper beads I've made, I've realized that there is always something new to learn and there are so many techniques!!! This post is a compilation of everything that I've learned about paper beads in the hopes that I can help you avoid certain mistakes I've made and so that you can have some really amazing paper beads!!
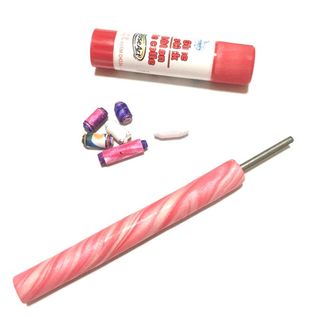
Materials & Tools Needed
- Paper (junk mail, newspaper, scrapbooking paper, etc.)
- Scissors
- Ruler
- Pencil
- Glue stick
- Glaze of your choice
- Rolling tool (either a paper bead roller or a toothpick/skewer)
- Brush (if brushing on glaze)
- Optional: glitter, paint, string, embellishments
DIY Paper Beads Step-By-Step Process
Step 1. Prep your paper. You can use any kind of paper to make your paper beads. Before you start you should decide if you want to draw, paint or somehow embellish your paper. You can always embellish your paper bead after you make it, but if you plan to draw on it or write a letter or word, you should do this before you start. Some cool things that I've done to prep my paper has been to apply some watercolor paints, glitter and bits of string before rolling my beads.
Besides embellishments, you may want to trace out the lines you plan to cut. If you're going to use scissors to cut your paper, I would recommend using a ruler and pencil to cut our your paper.
Besides embellishments, you may want to trace out the lines you plan to cut. If you're going to use scissors to cut your paper, I would recommend using a ruler and pencil to cut our your paper.
Step 2. Cut your paper strips. The easiest way to do this is to use a paper trimmer. You can find a paper trimmer in any craft store and it will make cutting a lot faster, not to mention it's easier on your hands than using scissors.
If you don't have a paper trimmer, use a good, sharp pair of scissors to cut your paper strips. Differently shaped strips will form various shapes when rolled into a bead. Triangular strips usually form oval beads, rectangular ones form tube-shaped beads. Experiment with different shapes.
If you don't have a paper trimmer, use a good, sharp pair of scissors to cut your paper strips. Differently shaped strips will form various shapes when rolled into a bead. Triangular strips usually form oval beads, rectangular ones form tube-shaped beads. Experiment with different shapes.
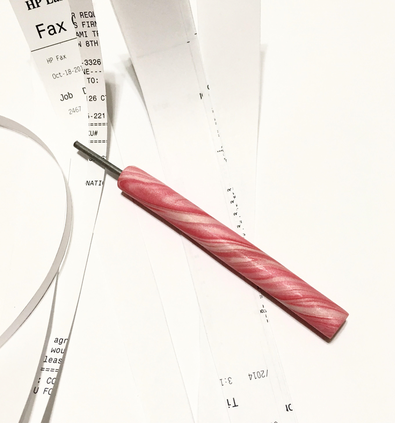
Step 3. Roll your bead. My preferred method is using a paper bead roller because it is the fastest way to make a paper bead and doesn't hurt your fingers like using a toothpick or skewer would.
To use a paper bead roller, simply slip one end of the strip in the metal slot, roll the bead and then glue the end with a tiny dab of school glue.
If you want to make paper beads with a toothpick or skewer, tightly roll one end of the strip around the toothpick/skewer and continue rolling the bead until the end of the strip. Do not let go of the bead or it will unravel. Secure with glue.
Step 4. Finish your beads by adding a top coat or glaze to them. I've used a lot of different glazes for my beads and tried different ways of finishing them. My preferred way to finish paper beads is to string them on a length of fishing line and to dip them into a mixture that is 1 part Modpodge and 1 part water. I then hang them to dry and give them 2 or 3 more dips. I have found this to be the easiest way to finish my beads and I like the results. Once the beads dry, simply snap them apart (the edges sometimes get stuck) and you're ready to use them!
If you want a thicker glaze, I've tried 2 options that have worked very well. One way to get a very shiny, thick coat is to use Triple Thick and paint it on one bead at a time. You may have to use more than 1 coat. Use a foam brick and some toothpicks to let them dry.
The other option is to use Ultra Thick Embossing Powder and a heat tool. Simply use a toothpick to roll the bead on the embossing stamp pad, cover the bead in UTE and apply heat with the embossing tool. The powder will quickly melt into a beautiful clear consistency and you'll have a gorgeous bead with a very shiny, thick coat. This process is a little more time consuming and requires more materials, but it is definitely worth it!!
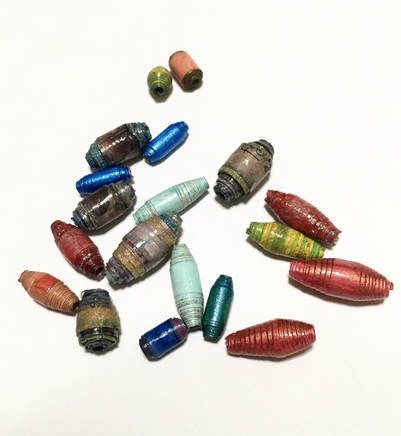
Step 5. Enjoy creating with your paper beads and don't get discouraged if your first (second or third) attempt is less than perfect. I created a lot of misshapen, awkward looking beads when I started (and I sometimes still do). Just keep creating!
Paper Beads FAQ
Q. What kind of paper works best for making paper beads?
- You can use virtually any kind of paper for making paper beads. My favorite papers are the ones I get for free: newspapers, junk mail, catalogs, and product packaging. Wrapping paper is also great with it's bright colors and pretty patterns. One thing to keep in mind, though: the thinner the paper, the smaller the bead.
Q. Will paper bead jewelry last?
- This will depend on a lot of factors. You want to make sure to give your paper beads various coats when you glaze them. It's also very important to remember that they are paper, after all. If you get caught out in the rain, you should be alright if you glazed them enough- but try not to go snorkeling with them. :) If you're very concerned about the paper beads' longevity, I would recommend only using the beads for earrings or necklaces (that way you don't run the risk of ruining them by submerging your hands underwater if you forget to take off your bracelet before washing your hands or doing dishes).
Q. How do I decorate paper beads?
- There are tons of way of decorating paper beads. You can paint them, draw on them with permanent markers, cover them with glitter or micro beads, glue on rhinestones for added sparkle. My advice would simply be to experiment, the best inventions are found by accident.
More Information On Paper Beads
If you still need some more info on making paper beads, I highly recommend these videos:
- JenniBellie's Massive Tutorial on paper beads is one of my favorites. It's one of the best videos I've seen on the subject and is perfect either for beginners or advanced crafters.
- Beyond Bracelet's tutorial covers the basics and also goes into how to decorate your paper beads using permanent markers.
- If you want to make paper beads that look like glass, thefrugalcrafter has a wonderful tutorial on how to make European style paper beads.
Ready to get started making paper beads? Start by making my DIY Paper Bead Roller!
