Triangle Paper Bead Pendant Tutorial
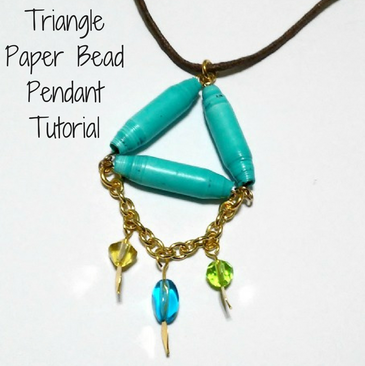
If you're looking for different ways of using paper beads in your jewelry, here is a simple tutorial on how to turn paper beads into a unique triangle pendant. This project is very easy to make so it's perfect for beginners and is also great as a craft show item since you can make a lot of them in a short amount of time. I added a chain with some colorful dangles for a little bit of a bohemian feel.
For the paper beads, I used a different technique of painting them which I think worked rather well. I dipped them in a mixture of paint, Modpodge and water and hung them to try between coats. This eliminated the need of painting them one by one and also saved time glazing them.
For the paper beads, I used a different technique of painting them which I think worked rather well. I dipped them in a mixture of paint, Modpodge and water and hung them to try between coats. This eliminated the need of painting them one by one and also saved time glazing them.
Materials
- Paper Beads
- Eye Pins
- Decorative Head Pins
- Chain
- Beads
- Jumprings (3 medium, 1 small)
- Necklace Chord
Tools:
- Round Nose Pliers
- Flat Nose Pliers
- Bent Nose Pliers
- Wire Cutters
Tutorial
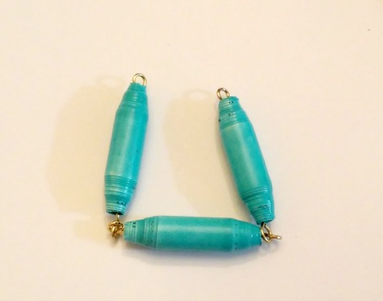
Step 1. Place the paper beads onto the eye pins and make a loop at the end of the pins. Link all three together.
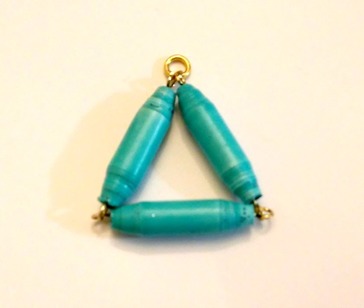
Step 2. Connect the two top loops together with the small jumpring. Next, connect a medium jumpring to the small one. This will ensure that the pendant hangs correctly.
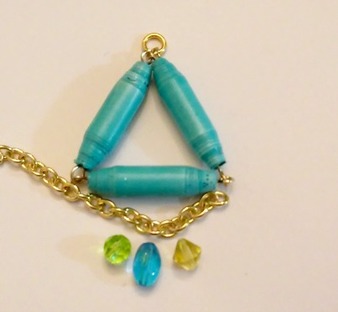
Step 3. Cut a piece of chain just a little bit longer than the length of your paper beads. Make three dangles with glass beads of your choice and decorative headpins. Connect the dangles to the chain and then use jumprings to suspend the chain from the loops at the bottom corners of the triangle.
Step 4. String the pendant onto a necklace chord and it's ready to wear!

Additional Ideas
Here are some other ideas you could try if you want to explore variations:
- A square pendant
- A pentagon pendant
- Any polygon that strikes your fancy. :)
